To trace the outlines of a photo in Illustrator.....
Go to stevecampbellhillwoodsamples.blogspot.com
You will be working with two documents. One is a Photoshop document and the other is an Illustrator document.
1. Find a simple photograph that is high resolution. Try caedes.net for photos. It would not be a bad idea to place this photo in the new Photoshop document. The resolution of the Photoshop document should be 300 ppi.
2. Open Illustrator & create a new Illustrator document.
3. Copy & paste the photo into the new Illustrator document.
Items 4 - 12 are illustrated with the images below.
4. Go to Object>Rasterize in the Illustrator menu. At the Rasterize menu, select Color Model: CMYK, Resolution: High (300 ppi), Background: White.
5. Go to Live Trace>Tracing Presets & Options menu.
6. Go to Tracing Options….
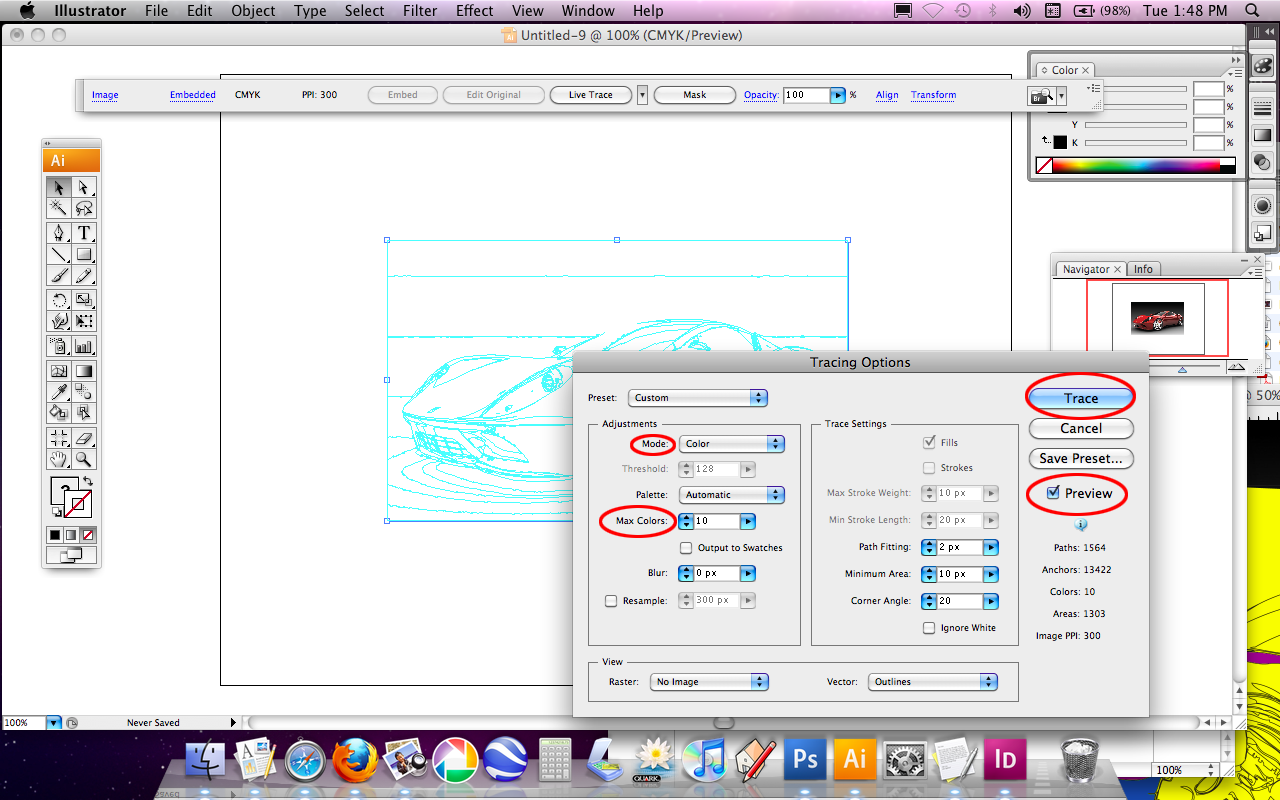
7. At this menu, be sure Mode is Color
8. Set Max Colors to 6 - 10. The lower the Max Colors value, the simpler the tracing and the fewer the number of areas created. You could raise Max colors to 25 - 30, and raise the Minimum Area value to 100. You can experiment here.
9. Check preview. You will see blue outlines.
10. Click Trace.
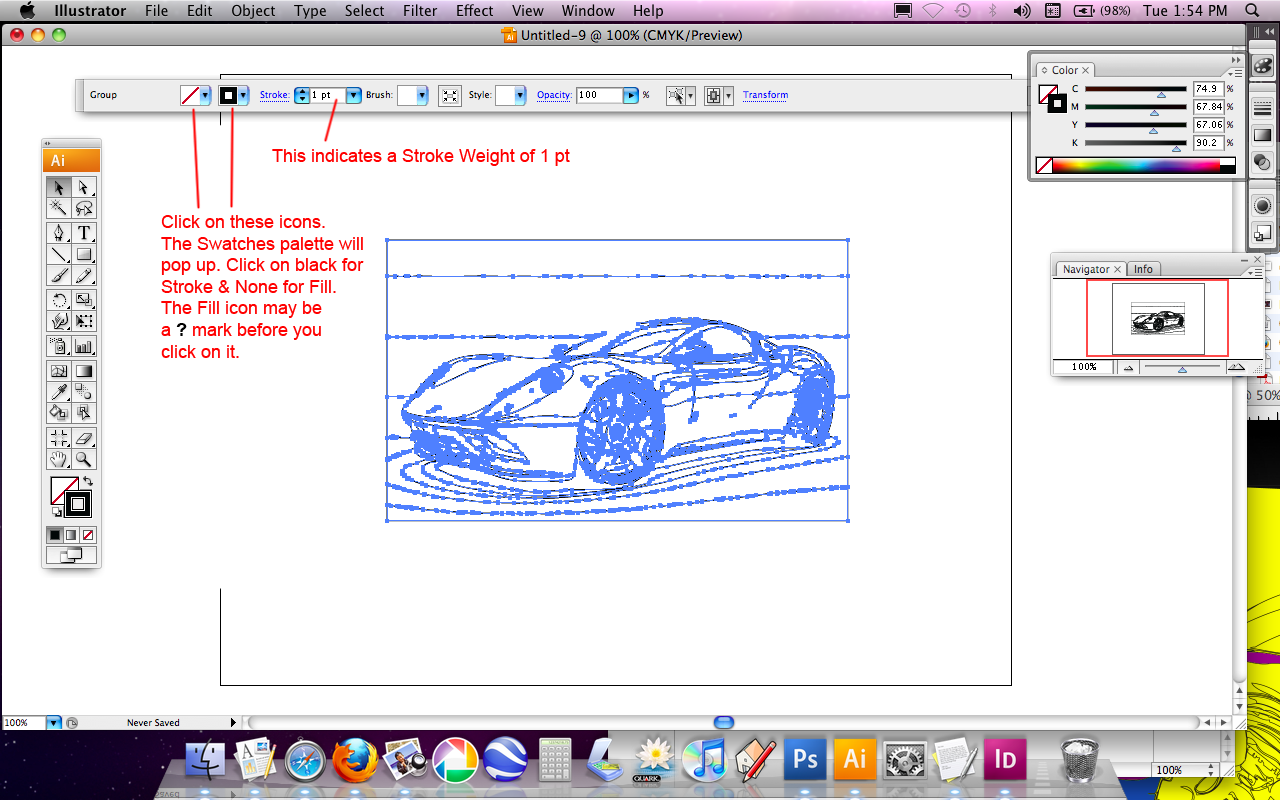
11. On the Control panel, click Expand.
12. On the Control panel, click on the ? mark and choose a fill of None. Then choose a stroke Weight of .5 (or more).
13. Copy and paste this into Photoshop.
14. Go to Layer>Rasterize>Smart Object

5

6
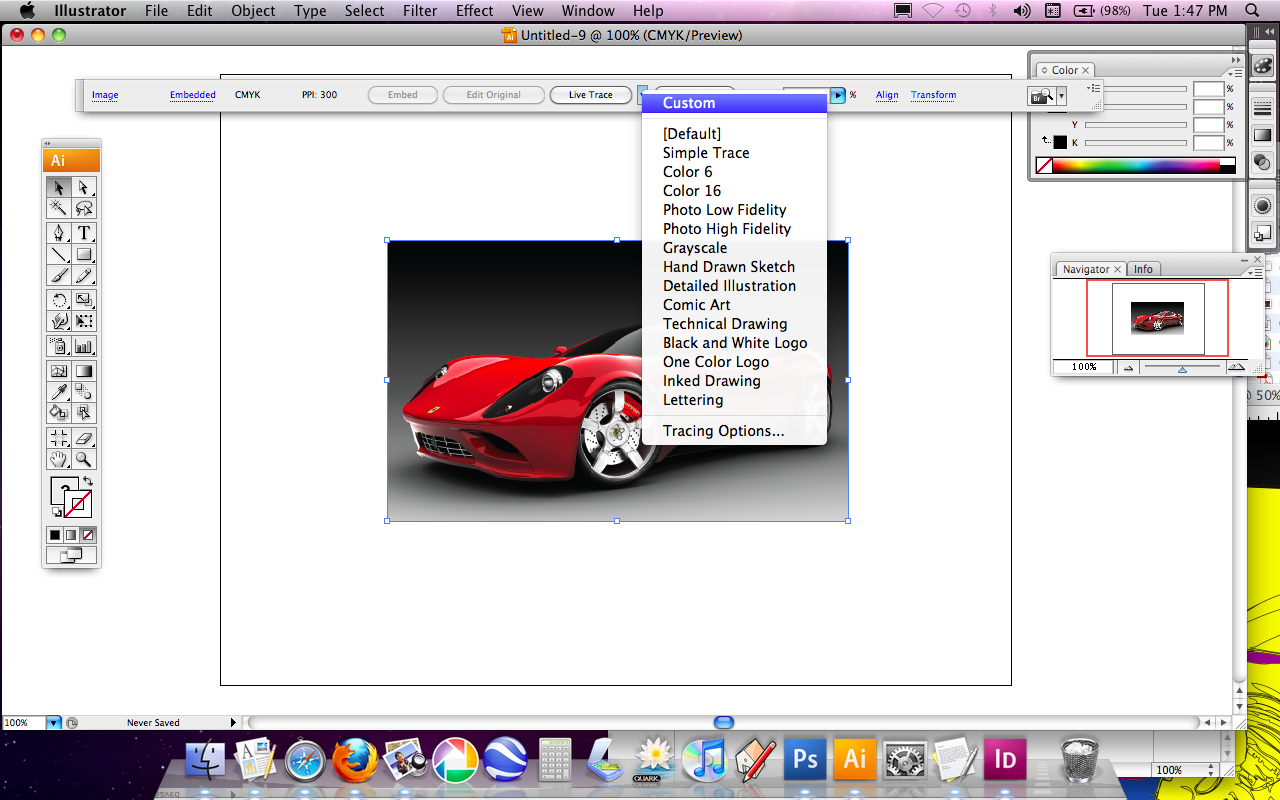
7-10
11-12